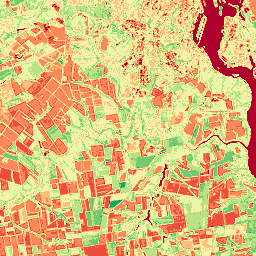
Quickstart 🚀
Welcome to EOSDA API Connect developer documentation 🛰
Overview
EOSDA API Connect is a versatile REST API designed for seamless integration of satellite data into your applications, offering compatibility with both custom applications and existing GIS applications. With access to Sentinel, Landsat, and other Earth observation imagery, the API facilitates easy browsing, visualization, and analysis of satellite data.
Backed by EOS Data Analytics' extensive expertise in geospatial data analytics, the API is designed for businesses and environmental challenges, delivering years of proven satellite-driven solutions.
Integration Steps
Account Registration
To begin utilizing EOSDA API Connect, follow these steps:
Register an Account: Create an account on the EOSDA API Connect user dashboard.
Trial Activation: To activate your trial account, please contact our sales team at api.support@eosda.com. We'll swiftly open the trial for you within one business day.
Authorization Once your account is active, authorization is crucial for accessing the API. Follow these steps:
Obtain Your API Key: Replace
<your_api_key>in the environment settings with your personal API key from the EOSDA API Connect user dashboard.Include API Key in Requests: Send your API key in the headers parameter of every request:
-H "x-api-key: <your_api_key>"
Example request: Render tile with NDVI from Sentinel2
curl --location --request GET 'https://api-connect.eos.com/api/render/S2/36/U/XU/2016/5/2/0/NDVI/10/611/354?api_key=<your_api_key>'

For trial use, each user is granted a unique API key with a limit of 1000 requests. Contact support to discuss increasing this limit or explore available Subscription Plans.
Access Mechanisms
Explore various access mechanisms to interact with the API:
Supported Tools: Use Python, Advanced REST API, Postman, Curl, or other tools while adhering to specified rules and limits.
Data Retrieval: Access data and statistics via API, ensuring compliance with defined rules and limits.
System Stability and Performance
To maintain system stability and performance, consider the following:
Speed Limit Filter: Every incoming request undergoes a speed limit filter to prevent deliberate attacks or unwanted scenarios.
Limit Restrictions: Adhere to the specified rules and restrictions to receive timely responses. Negotiate specific limits with our support team. Formation of requests according to rate limits
Best Practices
To optimize your experience and prevent errors, follow these best practices:
Store API Responses: Save frequently used API responses to avoid unnecessary requests.
Query Optimization: Only request the data you need to minimize the load on the system.
Error Handling: Monitor error return codes in responses, referring to the API documentation for troubleshooting information.
Server-Side Errors: In case of EOS server-side errors (5xx errors), promptly contact our support team.
API Usage and Request Limits
- Statistics: You can fetch one field per request, but up to 365 days, ~5 indices, ~3 sensors/satellites (supported datasets).
- Imagery: Find a satellite image (1 request), which will be processed for the next step; create a task for calculating index image (1 request); get image (1 request) = 3 requests in total -- 1 field, 1 index per 1 request.
- Zoning: Create field_id (1 request); create productivity map for field (1 request); get zoning map for field (1 request) — 3 requests in total.
- Weather: By default, an API key can process 10 requests per 1 minute. If you have a high-load application, we can discuss increasing the number of requests per 1 minute.
One API request can include a field size of 200 sq. km. or 20,000 hectares.
Fields & AOI management
There are two ways to work with the AOI in the EOSDA API Connect:
- Individual Coordinates in Each Request:
- Set the coordinates independently in every request.
- This method doesn't store your AOI information on our side.
In every section of the documentation there is described the above method to work with the API. But if you want to use another method, which allows to store the aoi id, please refer to the next point and documentation links provided.
- Field Management Endpoints:
- Explore the Field Management Endpoints, enabling the creation of a unique
field_idfor each AOI. Thisfield_idcan then be reused across multiple requests.
Learn more about working with field_id and the entire workflow here
Quick steps how to use API data
These workflows provide a short guide for utilizing EOSDA API Connect to retrieve NDVI images, statistics, and vegetation/productivity maps. For additional details and examples, refer to the respective documentation links provided.
Obtaining NDVI Image
- Utilize the endpoint Single Dataset Search.
- Get the list of scenes that cover users fields.
- Save the
view_idvalue from the request-response, as it will be used for downloading the image.
- Use the endpoint Download Visual.
- Add coordinates, with longitude first and latitude second.
- Specify a valid "format" parameter ("jpeg", "tiff", "png") when creating the task.
- Use the endpoint Task Status and get the image for your AOI
Obtaining Statistics (e.g., NDVI)
- Utilize the endpoint Task Creation.
- Add coordinates, with longitude first and latitude second.
- Check Task Status
Obtaining Vegetation and Productivity Maps
- Utilize the endpoint Create Field.
- Save the
field_idvalue (field id) from the request-response, as it will be used for creating the map. - Add coordinates, with longitude first and latitude second.
- Utilize the endpoint Create Vegetation Map or Create Productivity Map.
- Save the
request_urlvalue from the request-response. - Create a Request for Zone Information:
Utilize the endpoint Get Zoning Map for Field.
noteProcessing time is typically 30-300 seconds. Upon completion, an email with
field_idandzmap_idwill be sent to your emaol.Retrieve Zoning Map:
- Utilize the endpoint Get Zoning Map for Field once processing is complete.
- Download shp file of created map